

How to Build a Large Group Adventure
Building a larger scale adventure (Think: “puzzlehunt”) for multiple groups is different from building a treasure/scavenger hunt for a single person and/or single group. It’s similar in that it shares the basic objective: overcome a series of puzzles or challenges to get to the end. The process of getting there, however, is very different.
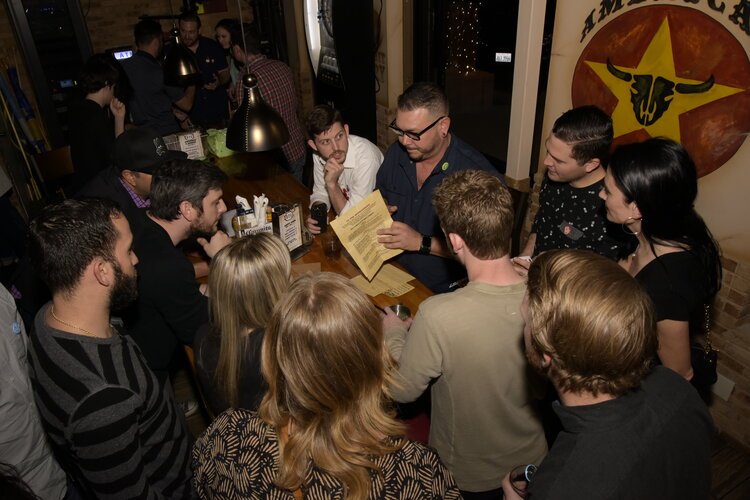
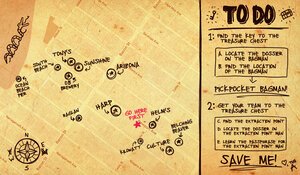
This is from my first ever Large Group Game: '“The Grand Hunt”.
A singular hunt really focuses on immersion. Because you’re only focusing on one person/group, you can build lots of pieces to make something mind-blowing. You also have time to pivot or build out a contingency if something goes wrong. There is plenty of downtime in a singular hunt. In a game involving multiple people or groups, you get zero time to make major changes.
Larger group games are all about crowd control. You can’t add in intricacies late because there is so much less room for error. If something goes wrong with a singular hunt, you have time to adapt and change. You probably have a good idea where the person is and can act accordingly. With larger groups, you have lots of people running around. People are always traveling to and from different stops. You really need to focus on the stops and the clues/instructions that get them there. Make it broad, beatable, and flexible if possible.
Here is my formula for large group games:
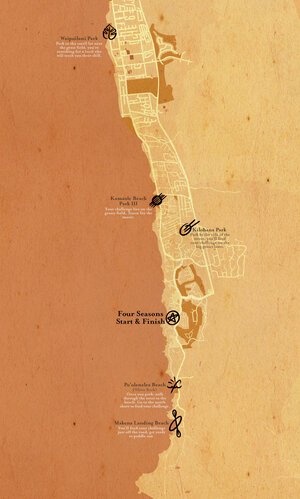
Everyone starts and finishes in the same place, but instead of a linear path, there are a series of checkpoints that can be completed in any order.

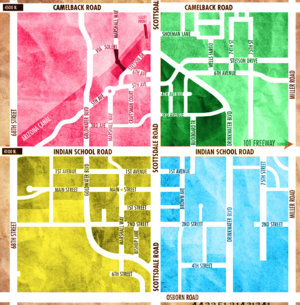
For this adventure, there was one checkpoint located in each colored square on the map.
In the mid 2000’s, there was an explosion of adventure races (usually called “mud runs” ) where participants ran a course with a number of obstacles they’d overcome on the way to the finish line. The biggest problem was a bottleneck that happened at every single obstacle. It was a really frustrating experience. Who wants to run a race where part of the time is spent standing in line waiting for other people to complete a challenge? So when I create large group games, I want to keep things as fluid as possible. When building an adventure for a single person, you should absolutely make it linear. When designing an adventure for multiple people/teams, keeping it open-ended will make it much more enjoyable for everyone (including yourself).
Here are some other things you should factor in:

I like to ensure my teams are spread out by dictating their first stop and then letting them choose from there.
Put participants in groups. Instead of 30 separate individuals, you’ll only have to focus on 5-6 groups!
Give teams clear information of goals and let your players know they can choose their own path (or you can force specific teams to hit a certain checkpoint first to ensure you have an even spread of the teams in the beginning).
The amount of checkpoints should vary depending on the number of groups:
Think to yourself- how many groups can different checkpoints handle? Bars and restaurants probably only want 1-2 groups at a time, where maybe an agent/actor walking around a park can handle more.
Make some checkpoints really easy to find, but once players arrive, there is a hard challenge. Or maybe you know right where they are, but they’re a long ways away or in a hard to reach area. Others can be really “puzzly”/tricky to find but upon arrival, teams receive their prize and move on.
So what do teams collect at each checkpoint? You have two main options:

During the Grand Hunt 2, there were 15 caches of keys spread around Ocean Beach, San Diego. In each cache, there were keys of a certain color. Participants needed to present 10 different color keys to be let in to the final location.
At each checkpoint, teams collect a clue to the finish line. Once they collect enough clues, they can deduce the answer and find the finish line.
The downside to this is how you choose the number of clues. Short of taking a piece of paper and cutting it up into pieces, you might have trouble figuring out what piece of information to give. You don’t want a team getting lucky by hitting the perfect two checkpoints and getting all the info they need, thus finishing the game an hour and a half early.
I prefer the “collect X number of tokens” route. In this way, the challenge can be “collect 10 different color gems and present them to cross the finish line.” You can have 15 checkpoints. Since teams only need to find 10 stops, everyone gets more flexibility. Teams can choose a route that plays to their strengths. Also, if something goes wrong at one stop (maybe a restaurant gets overcrowded or a random person steals a cache) it doesn’t break the game.
MAPS are awesome and make a great centerpiece for the adventure
At some point, I’ll do a full video or blog of the full uses of maps, But for now I’ll chat about the basic use. Maps are great because they’re relatively easy to make. You can use a website like snazzymaps to spruce up a regular google map screen shot. Maps work great for many reasons:
You can ensure that your players know the boundaries of the game.
You can put initial instructions on the map in a succinct manner.
You can print all clues on the backside of the map so everything is in one place.
You can add vellum paper overlays to give more clues.
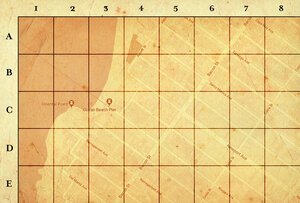
You can put an XY grid over the map that can be used with other puzzles.
Below you’ll see four examples of different maps I’ve used for large group games. Notice the grid, colors, locations, and instructions. You don’t NEED to have any of these, but they could help!
There we have it. Use this formula! Once you lock down the start, finish, and checkpoints, then it’s just a matter of plugging in gambits (clues, puzzles, instructions, etc.) to send them to said locations. You can find tips and help in this blog, on my YouTube Channel, or in my Subreddit.
Until next time, happy adventure building!