
Structures to follow when building a puzzly Adventure
So, you’re building a puzzle filled Adventure! You’ve got a theme, some scattered thoughts about puzzles or locations you’d like to use, and now you’re staring at a blank sheet of paper trying to figure out how to start building out your ideas. You’re in the right place, dear reader. This article is here to give you an outline of commonly used structures, how to use them, and step-by-step instructions for how to combine your ideas into a cohesive narrative, regardless of group size. At the end, I’ve included an example of my most recent hunt, and all of the planning that went into it so that you can see an example in practice.
Hunt Format Structures

Linear Structure
Linear structure is the simplest structure; it’s just a straight line forward, where one puzzle’s answer leads to the next puzzle in the sequence. It’s easy to execute, straightforward to design, and simple to follow. Linear design is very difficult to avoid entirely, since in most adventures, everyone starts and ends at the same point. Best for 1-2 people, or you’ll have players left out of the solve for most puzzle types.

Branching Structure
Branches are the splitting of the linear structure into multiple paths. Instead of just a single course, players have multiple ways to progress. This is very helpful for groups of 3 or more players, to ensure everyone is occupied, and it’s also a great way to add complexity and collaboration to your hunt. More branching paths means more simultaneous clues at your player's disposal, but for every set of branches, there must eventually be a bottleneck to bring the adventure back together.

Bottlenecks
Bottlenecks are where multiple disparate paths converge, where nothing else can be done but this ONE thing. Bottlenecks should involve as many people as possible, either in the solve or the spectacle of what comes after. Everyone is gathered with their attention focused in a single location, don’t waste that opportunity to do something flashy and/or magical. Meta Puzzles (link to meta puzzle blog post) are a great way to bottleneck, but you could also use this opportunity to further the story of your adventure. That said, make sure your bottleneck doesn’t overstay its welcome. Keep it snappy and allow your players to continue moving forward.
Mapping the Adventure

We know so many professional escape room designers who use Post-its when designing a room.
First and foremost, you need to decide on what tool you’d like to use to map out your adventure. Anything can work here, but here are some suggestions. If you want a physical solution, I like post-it notes or index cards, because they’re easy to reorganize, and they’re very cheap. Some of the better free digital solutions are Microsoft Visio, Freeform, and Draw.io.
Now that you have a mapping methodology, where do you start? I suggest starting with the beginning and ending of your Adventure, along with any puzzle/story ideas you want to include. Don’t worry about connecting these ideas until you get them written down. For each idea, try to include:
· The Gambit (puzzle, action, etc)
· The Location
· The Method needed to solve the puzzle
· The Solution (if applicable)
Once your ideas are laid out in front of you, start linking them together. Some people find it easier to start from the beginning, others prefer to work backwards from the ending. Try both and see which you prefer. Move ideas around and see where they feel the best to you. Try out different structures, with branches and bottlenecks. Make sure that your answers lead your players to the next location(s), don’t expect them to blindly explore to find clues. If something’s just not working, you can either take a step back and reassess where it can fit within your structure, or this idea might need to wait for another adventure.
I highly recommend drawing or printing a final map of your hunt, so you can keep track of the progress of your hunt as it unfolds. The map is also helpful for resetting the game, and for picking up after yourself and making sure you’ve got all your puzzles accounted for.
Here is the planning session for my most recent puzzle hunt

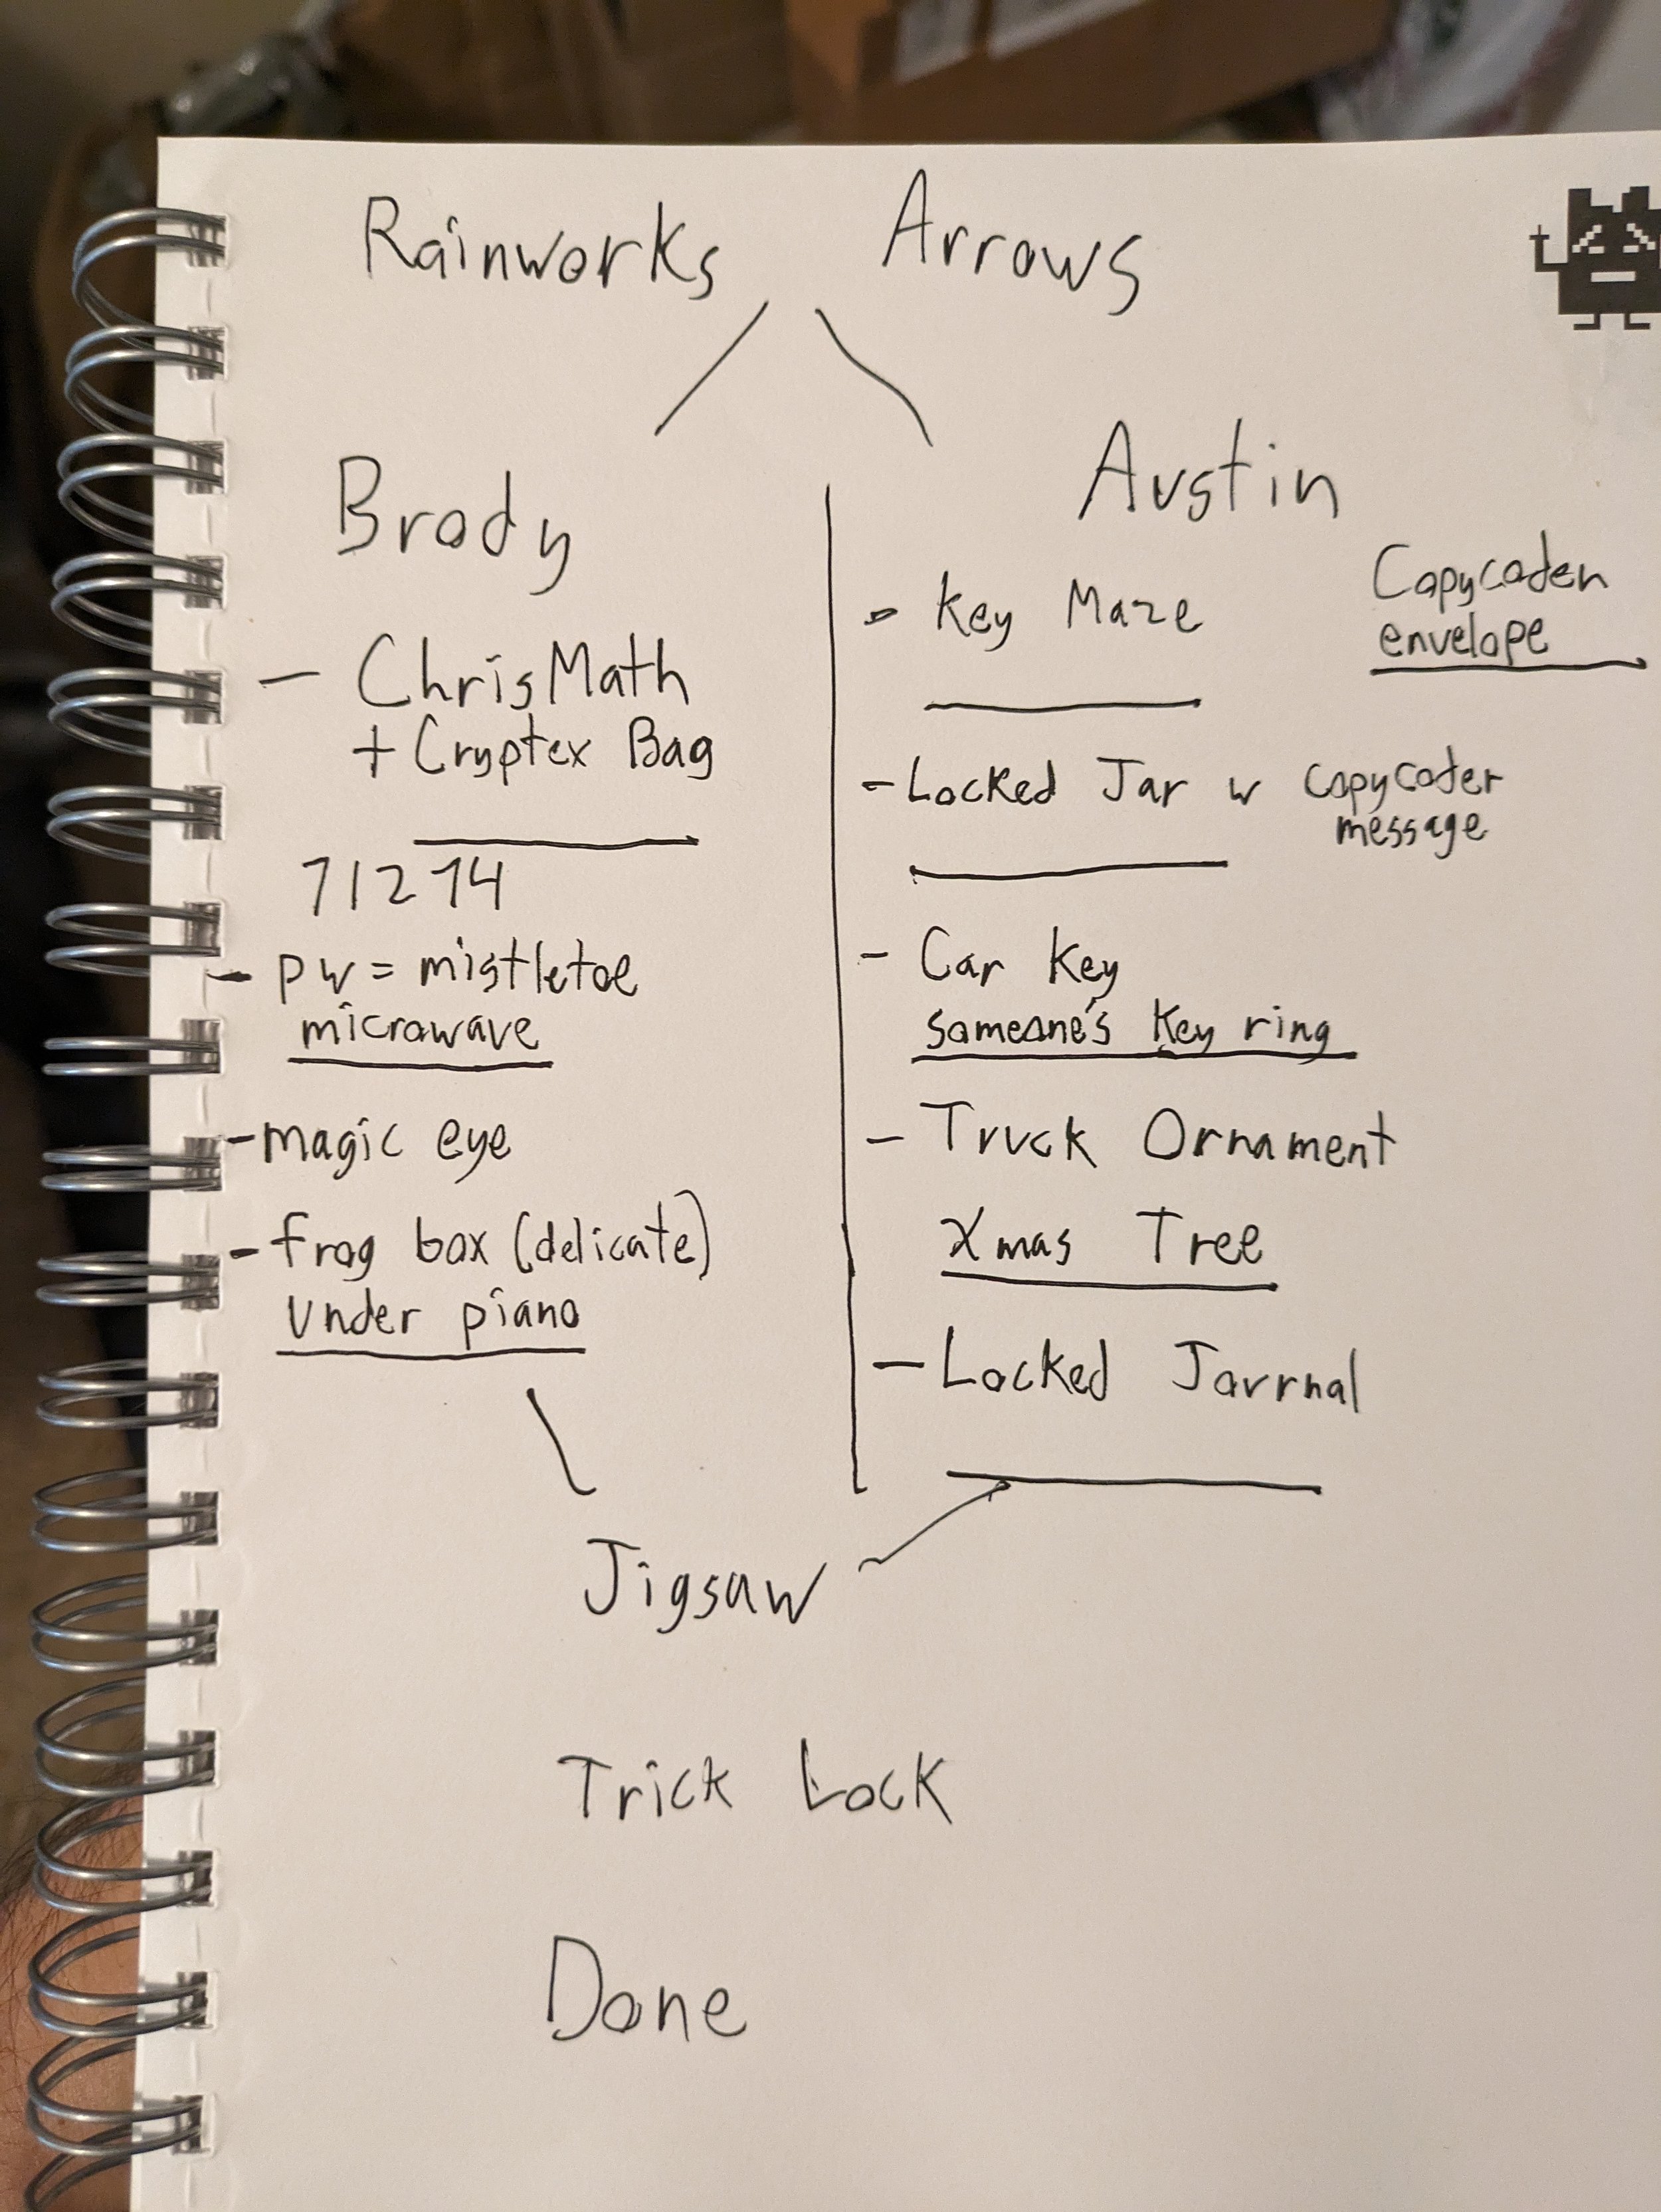
Here is the planning session for my most recent puzzle hunt.
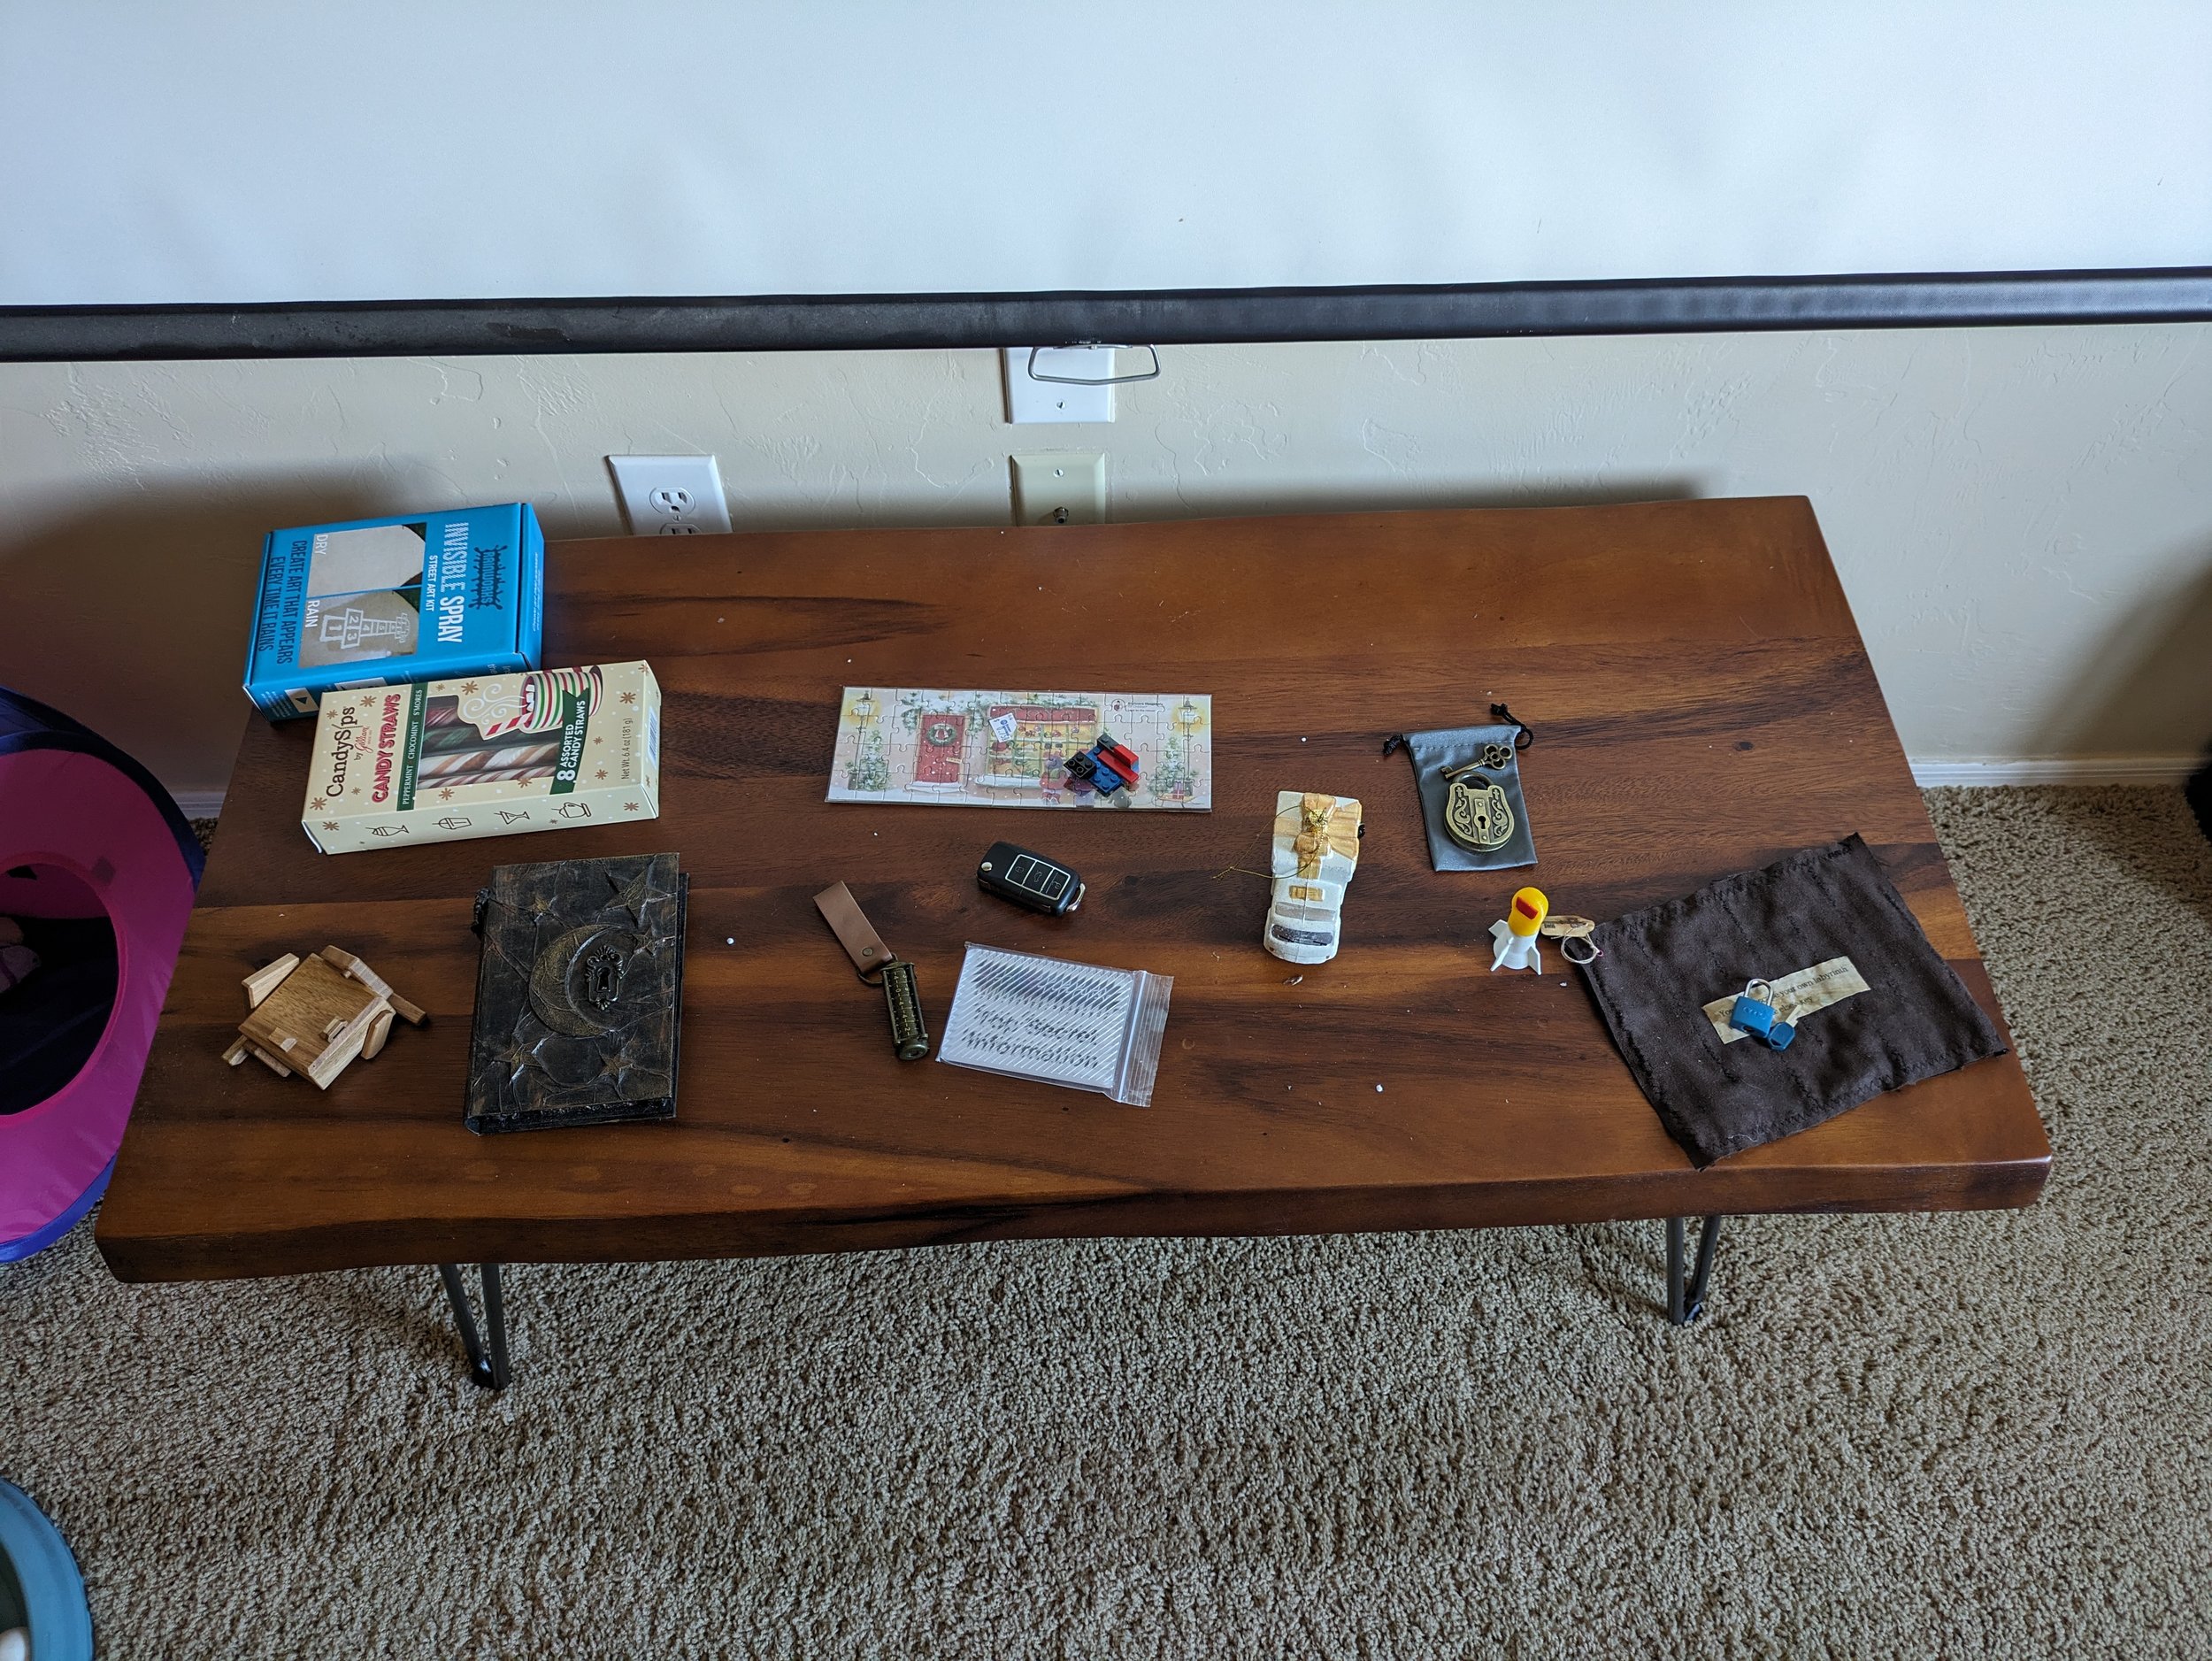
I started by laying out all the puzzles and gambits that I wanted to use.
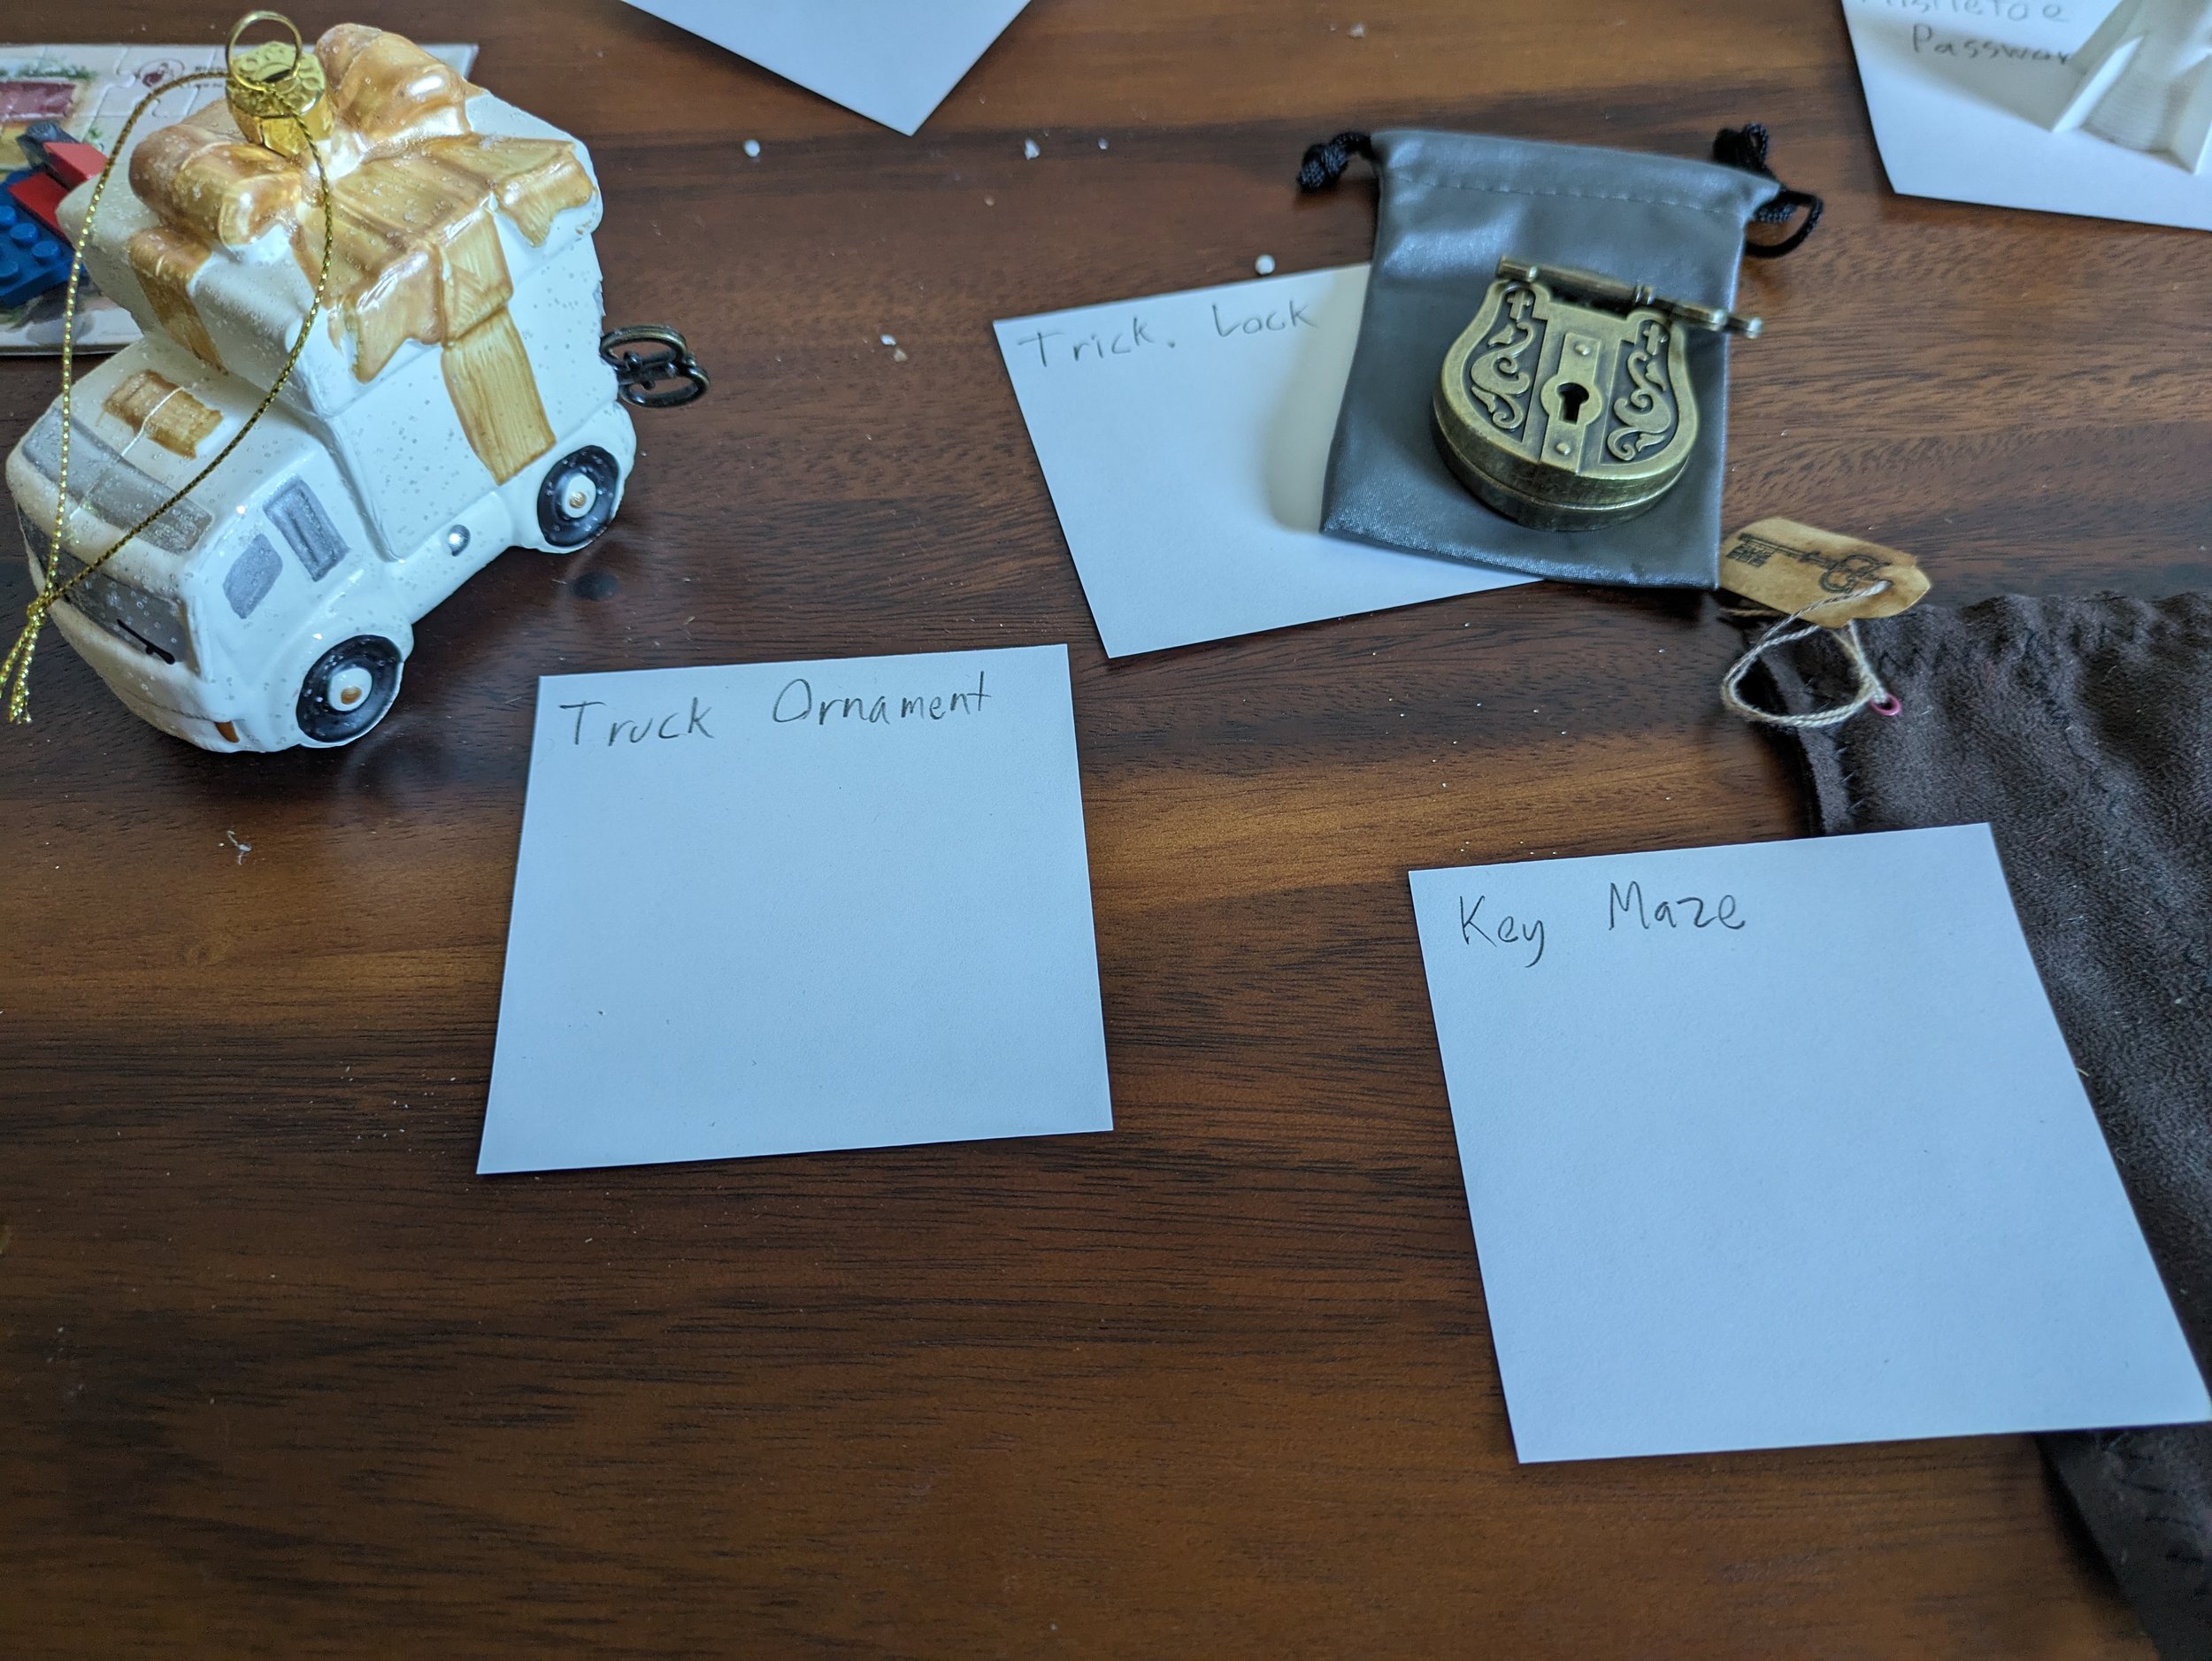
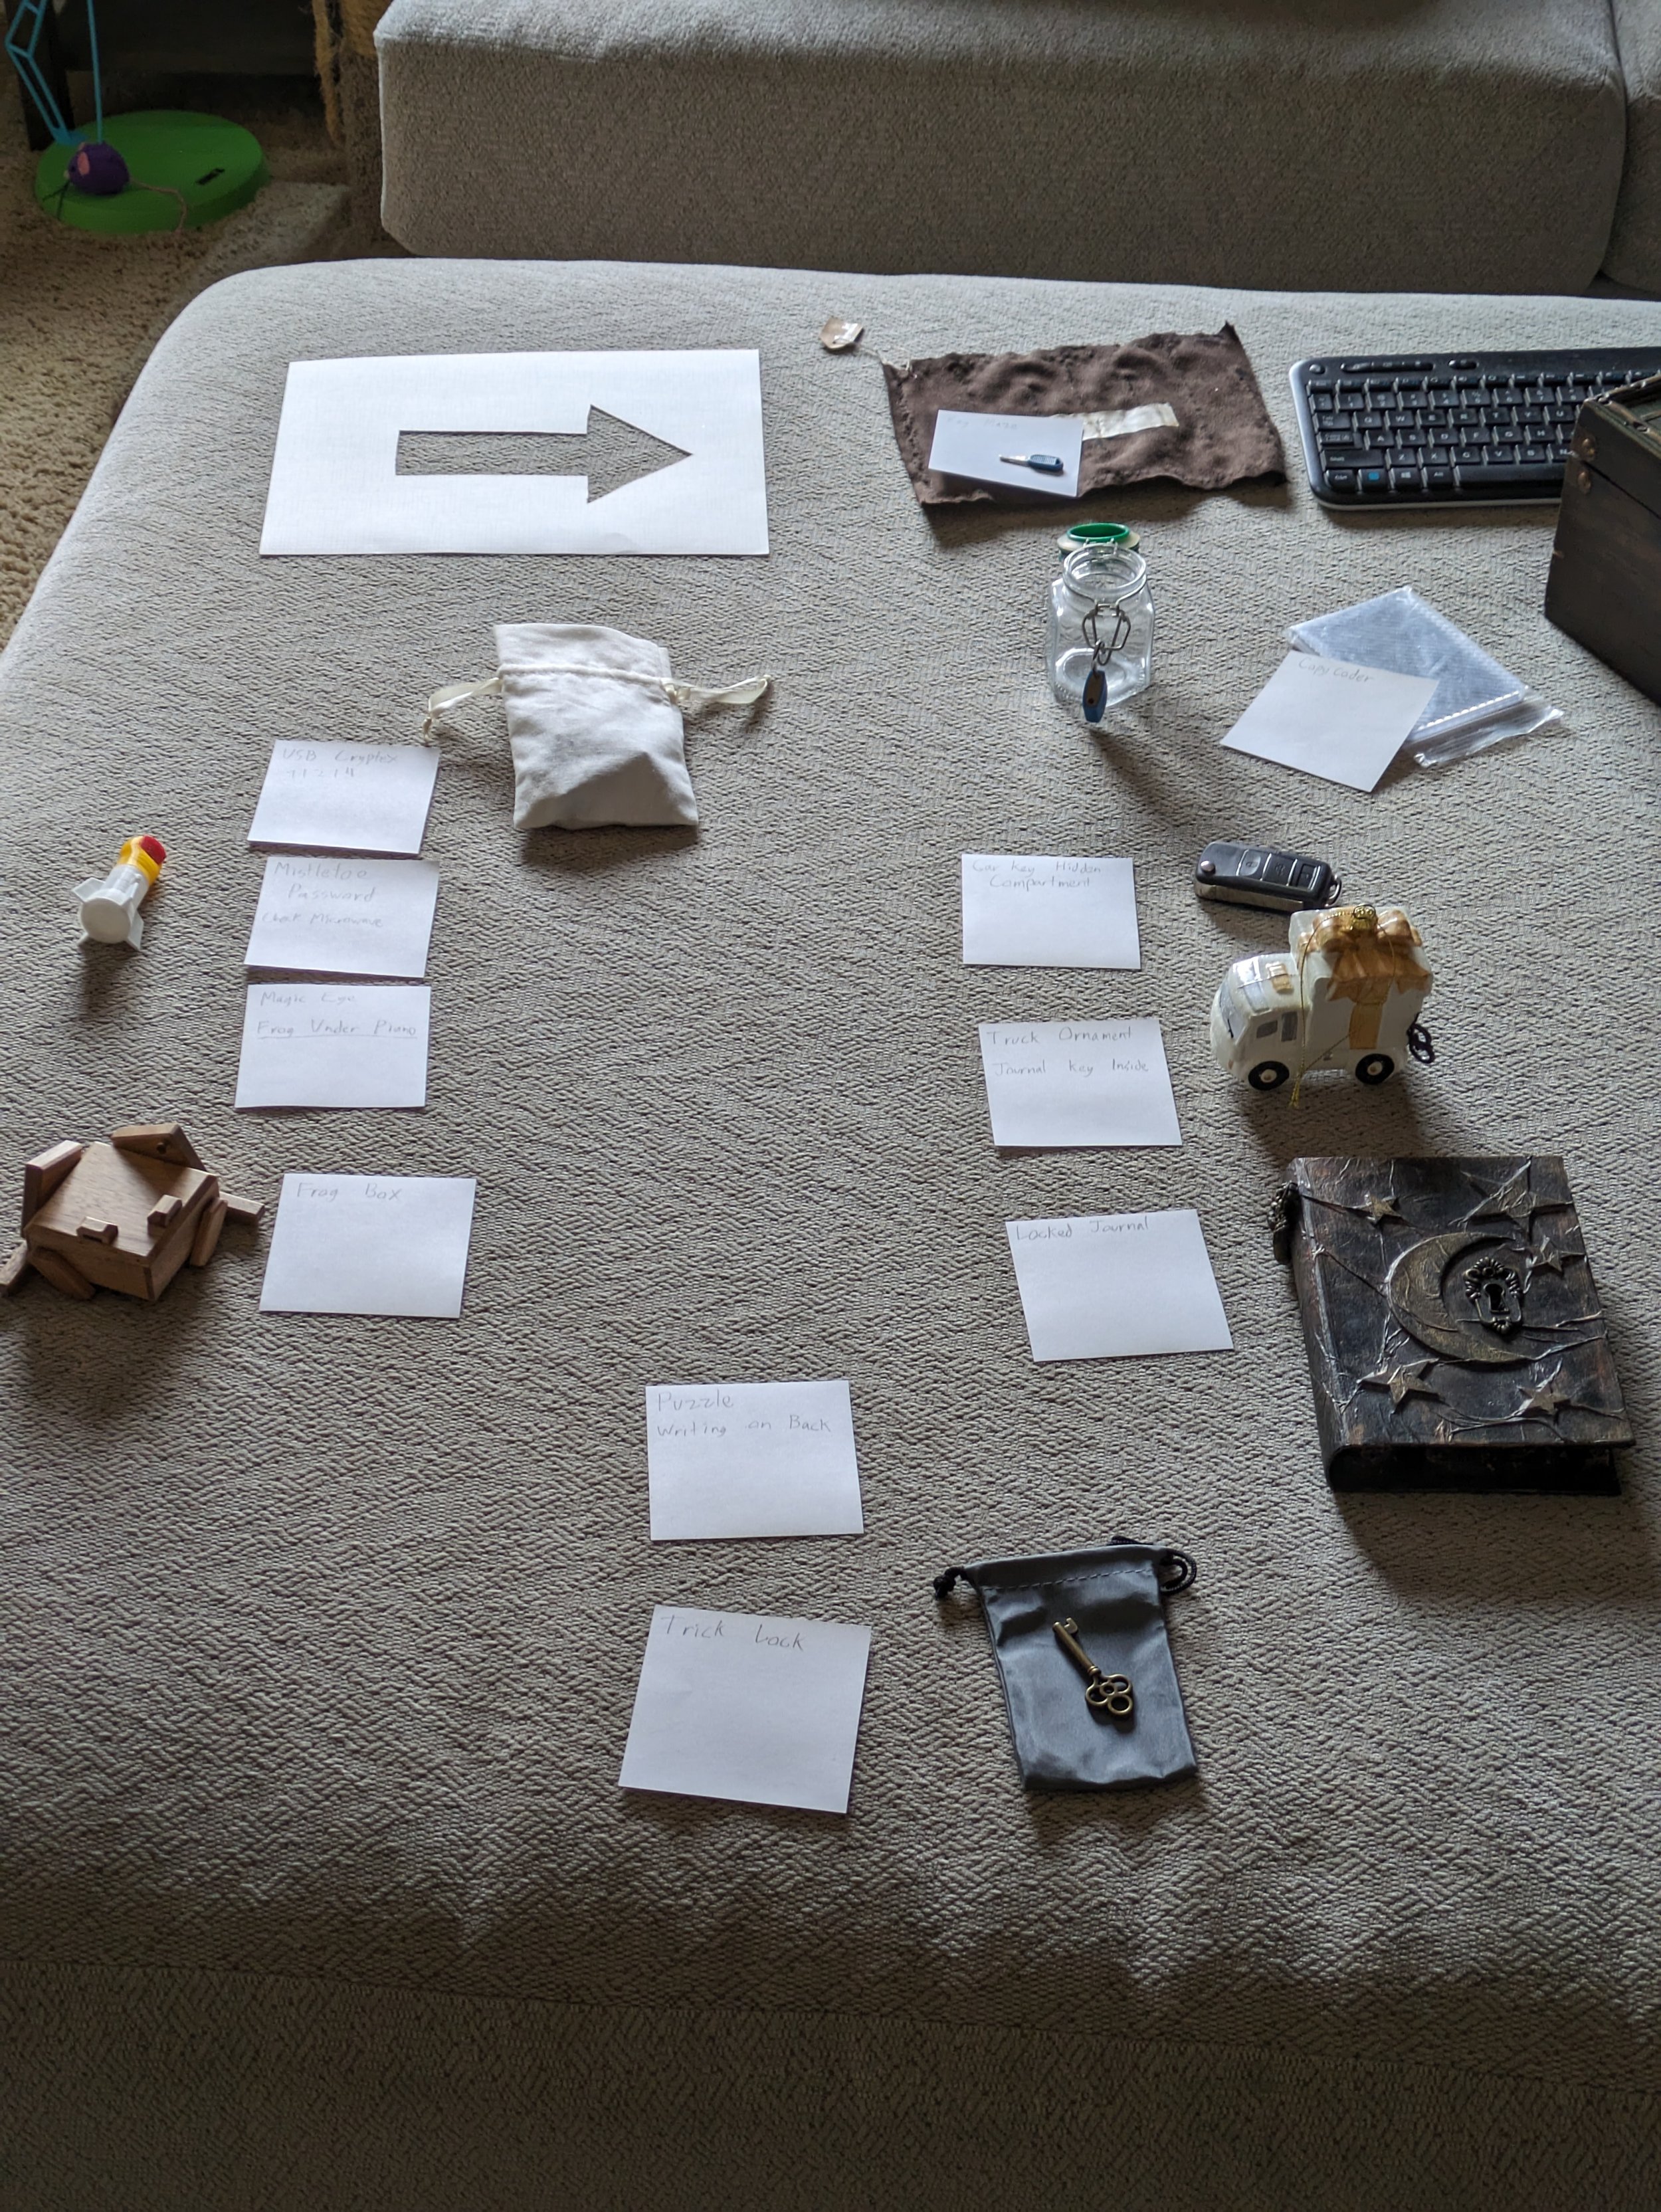
Then, I made post-it notes for each of these items and laid them out for a first draft of my hunt structure. Looking at the initial structure, I could see what parts of my hunt needed a little more, so I brainstormed some puzzles to fill in the gaps, giving each puzzle a post-it note and placing it within the hunt outline.
Once I was satisfied with the outline, I placed each puzzle next to its corresponding note, and ran through each puzzle in order as a sanity check.
From here, I drew out the outline, including each object along with its corresponding location and answer (where applicable). Since I was running this hunt at my Brother-in-law’s house, I couldn’t set it up ahead of time, and I wasn’t sure about some of the locations I would use. So, I left several blanks on locations that weren’t already coded into puzzle answers and built quick riddles to lead to those locations as I set up the hunt. Not terribly elegant, but it helped a lot in building a hunt that had to be set up quickly, and filling in the blanks on my outline gave me peace of mind knowing where everything was (in case my riddles fell flat).
Of course, there are plenty of methods for building out an Adventure. If you have a system that works better for you, please share your methods in the comments below so we can all learn from each other. That said, I hope these tips and techniques have helped you refine your creative process, and that you find adventure building a little less hectic.
